
Goal
After reading this article
you'll:
Understand how to enable the Helpdesk Channel
- Understand how to use the Helpdesk Channel
Summary
The Helpdesk channel simulates a ticketing
support system in which tickets can be
raised and replied to.
Allow teams to respond to support tickets as they would in real life.
| Name | Helpdesk Channel |
| Benefit | Allow teams to respond to support tickets as they would in real life. |
| Features |
|
Helpdesk Channel Overview
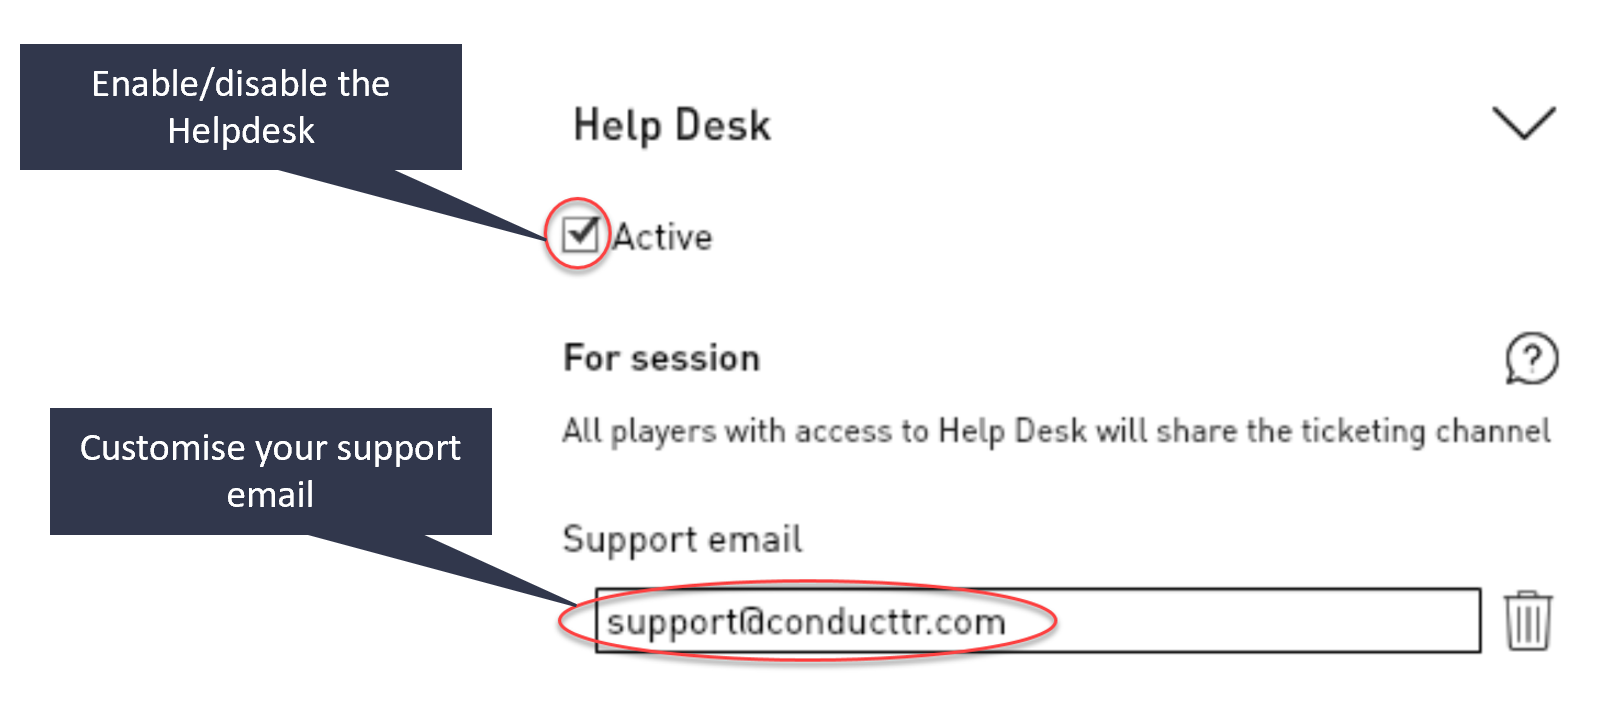
Enabling the Helpdesk
channel
- In the Scenario Editor,
go
to Style >
Customise
channels >
Helpdesk
- Ensure the Helpdesk is set to
active
- You need a support
email to be
able to use
Helpdesk
- Players will send an email to
this
email address, and agents
(players
with the Help Desk Agent
special
permission) will
receive this
message via the Helpdesk
channel.
Sending tickets
to players
- Tickets can be sent to players using injects or Pattern of
Life
- Role players can also raise
tickets during a live
exercise
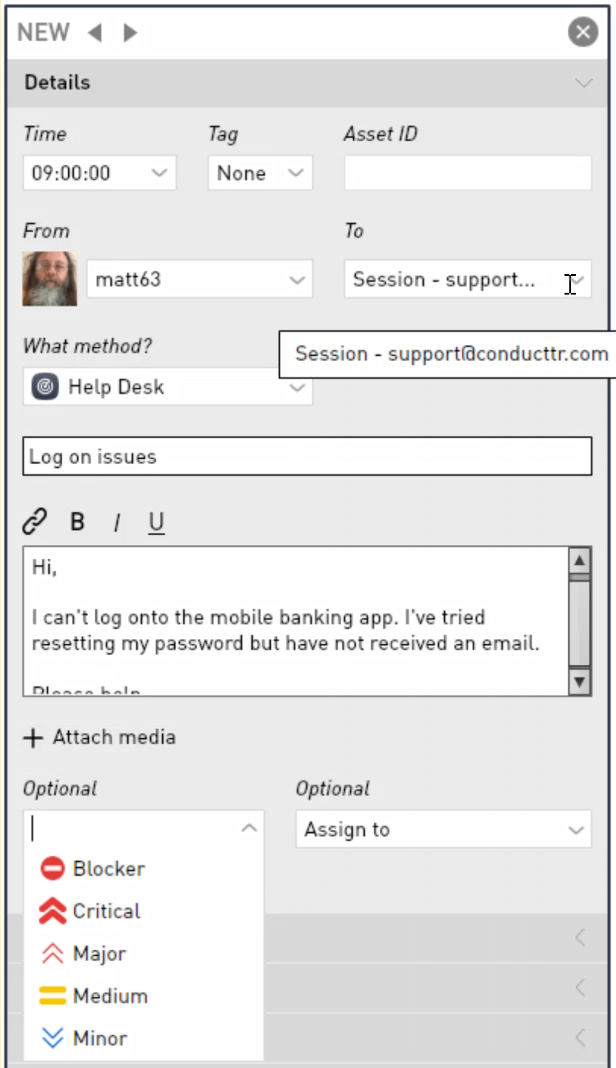 | Send tickets using
injects 1. In the Scenario Editor,
create a new
inject 2. Select "Help
Desk" as the channel 3. The persona underneath
"From" represents who will be
raising the ticket 4. All tickets
should be sent to the support
email you created. 5. Give the ticket a
subject and text 6. You have the
option of setting the tickets
importance 7. You can also
assign the ticket to a
position |
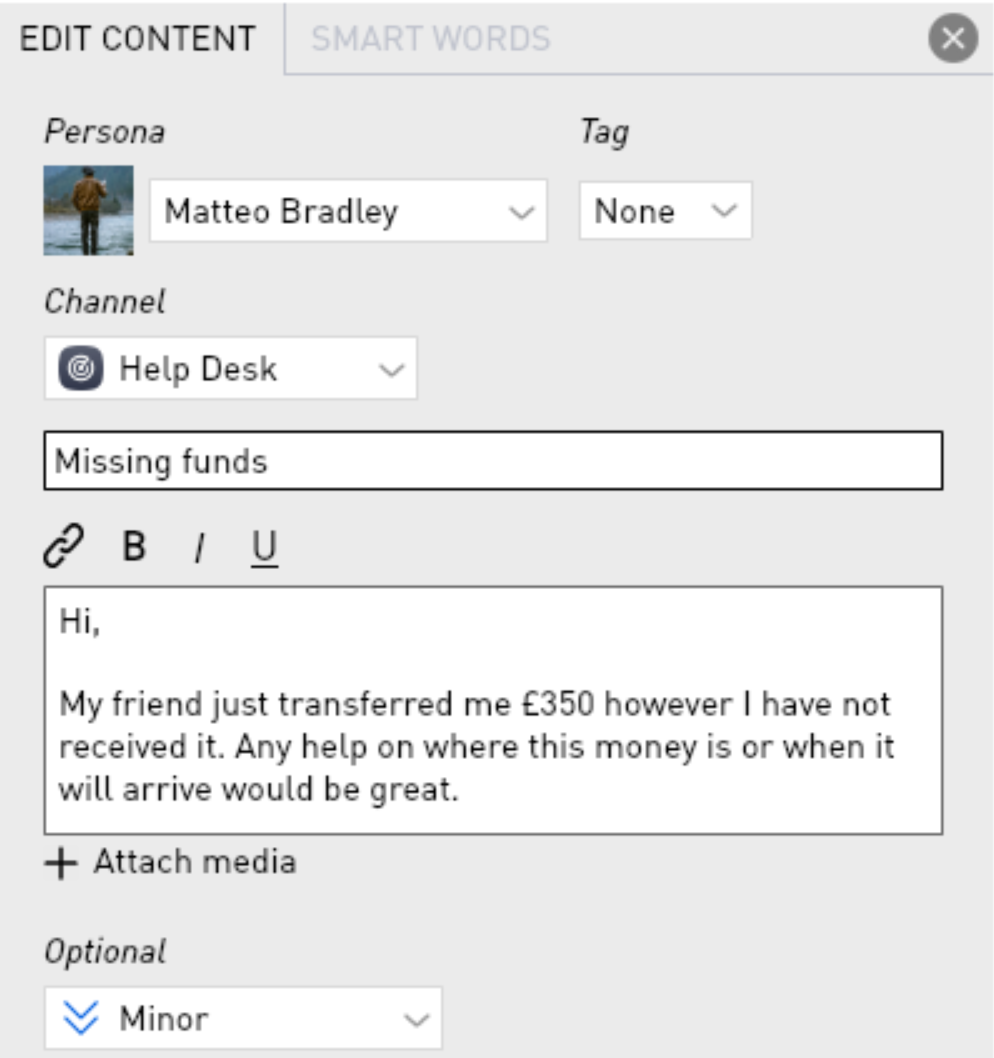 | Send tickets using
POL 1. Sending tickets using POL
is the same as sending tickets
using injects as described
above Note: With POL, you
cannot assign tickets to a
position |
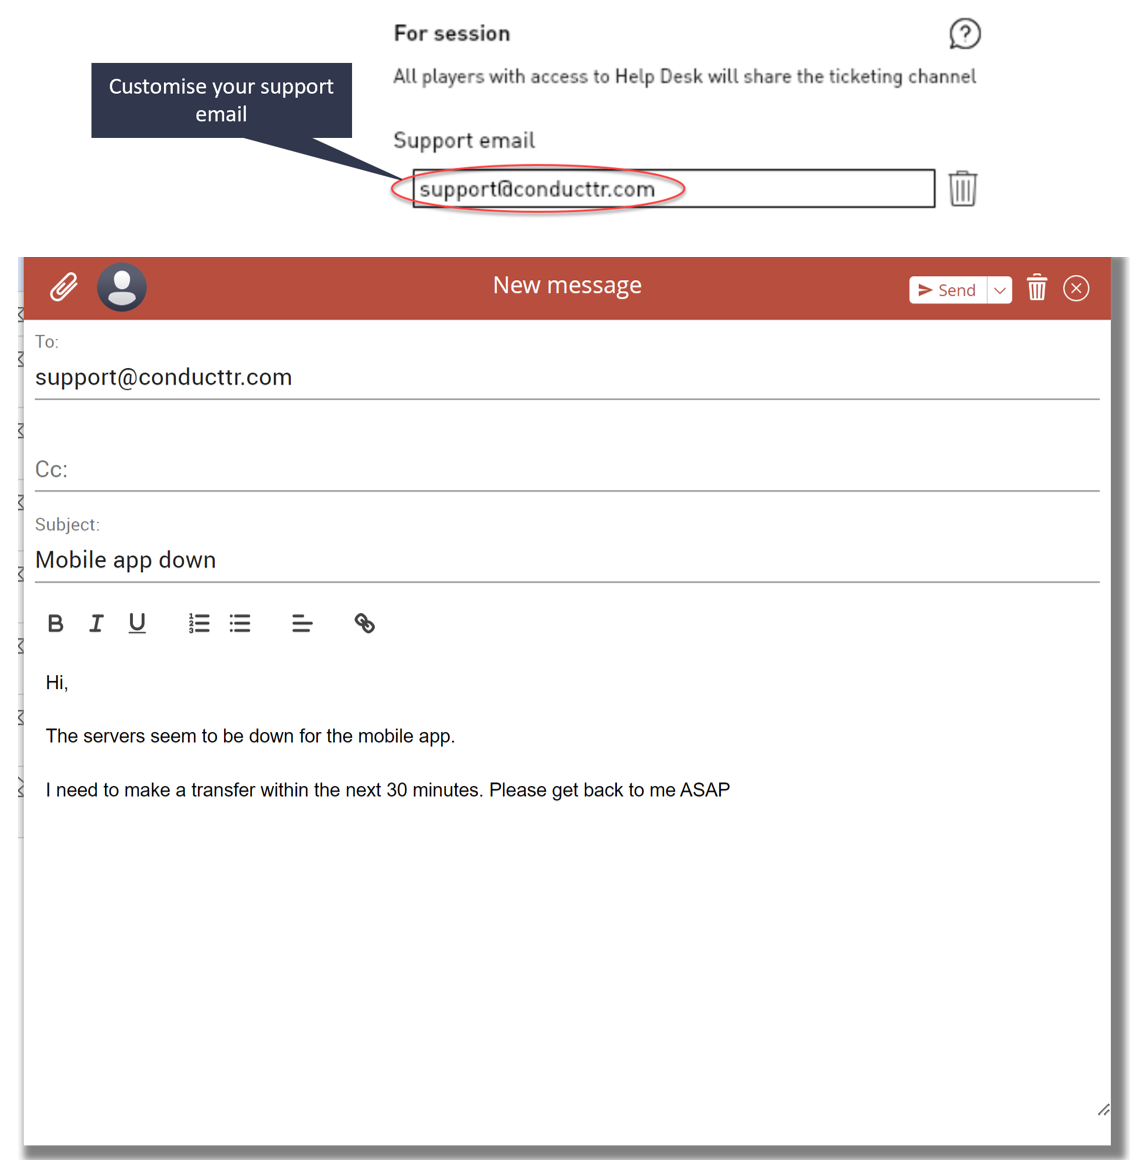 | Raise tickets live during
an exercise 1. Ensure you have set up
your support email in
the Scenario Editor. Go
to Style >
Customise
channels >
Helpdesk 2. Compose a new
email, ensuring the email is
sent to the support email you
created 3. Upon sending this
email, this will automatically
create a ticket on the
Helpdesk where players can
respond. |
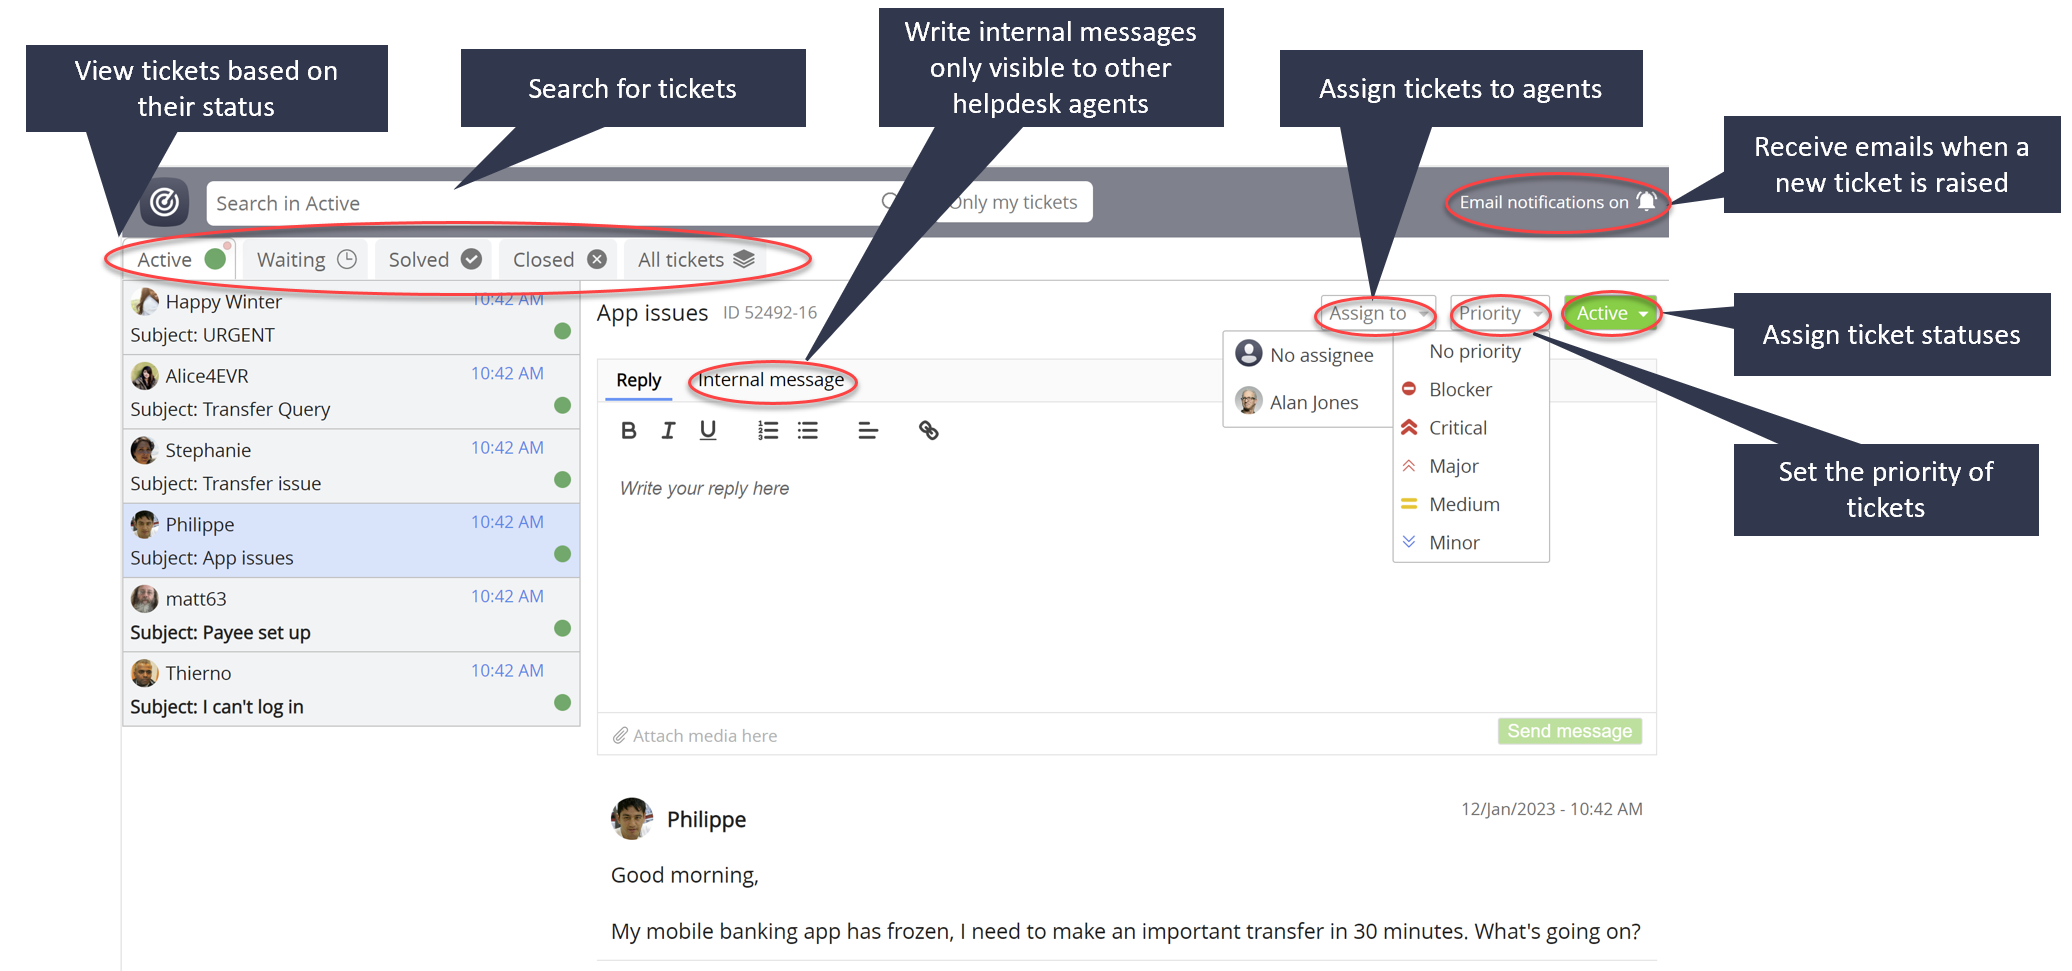
Replying to tickets
- In order to access the Helpdesk
channel and reply to tickets, players
need to be assigned the "Helpdesk
agent" special
permission.
- For more information on how to assign
players special permissions Click
here.

- When a ticket is raised, players will
receive an email and Helpdesk
notification, alerting them.
- In the email channel, players can click on
the ticket number to be taken to the
ticket on Helpdesk.
- From there, in the reply box, messages can
be typed. Once your message has been
composed, click "Send
message".
- The player/persona who raised the ticket
will receive replies via
email.
.gif)
Setting priority of tickets
- Ticket priorities
provide a way to
categorize tickets based
on urgency and importance
level
- You can assign priorities of tickets by
clicking one of the options from the
dropdown menu

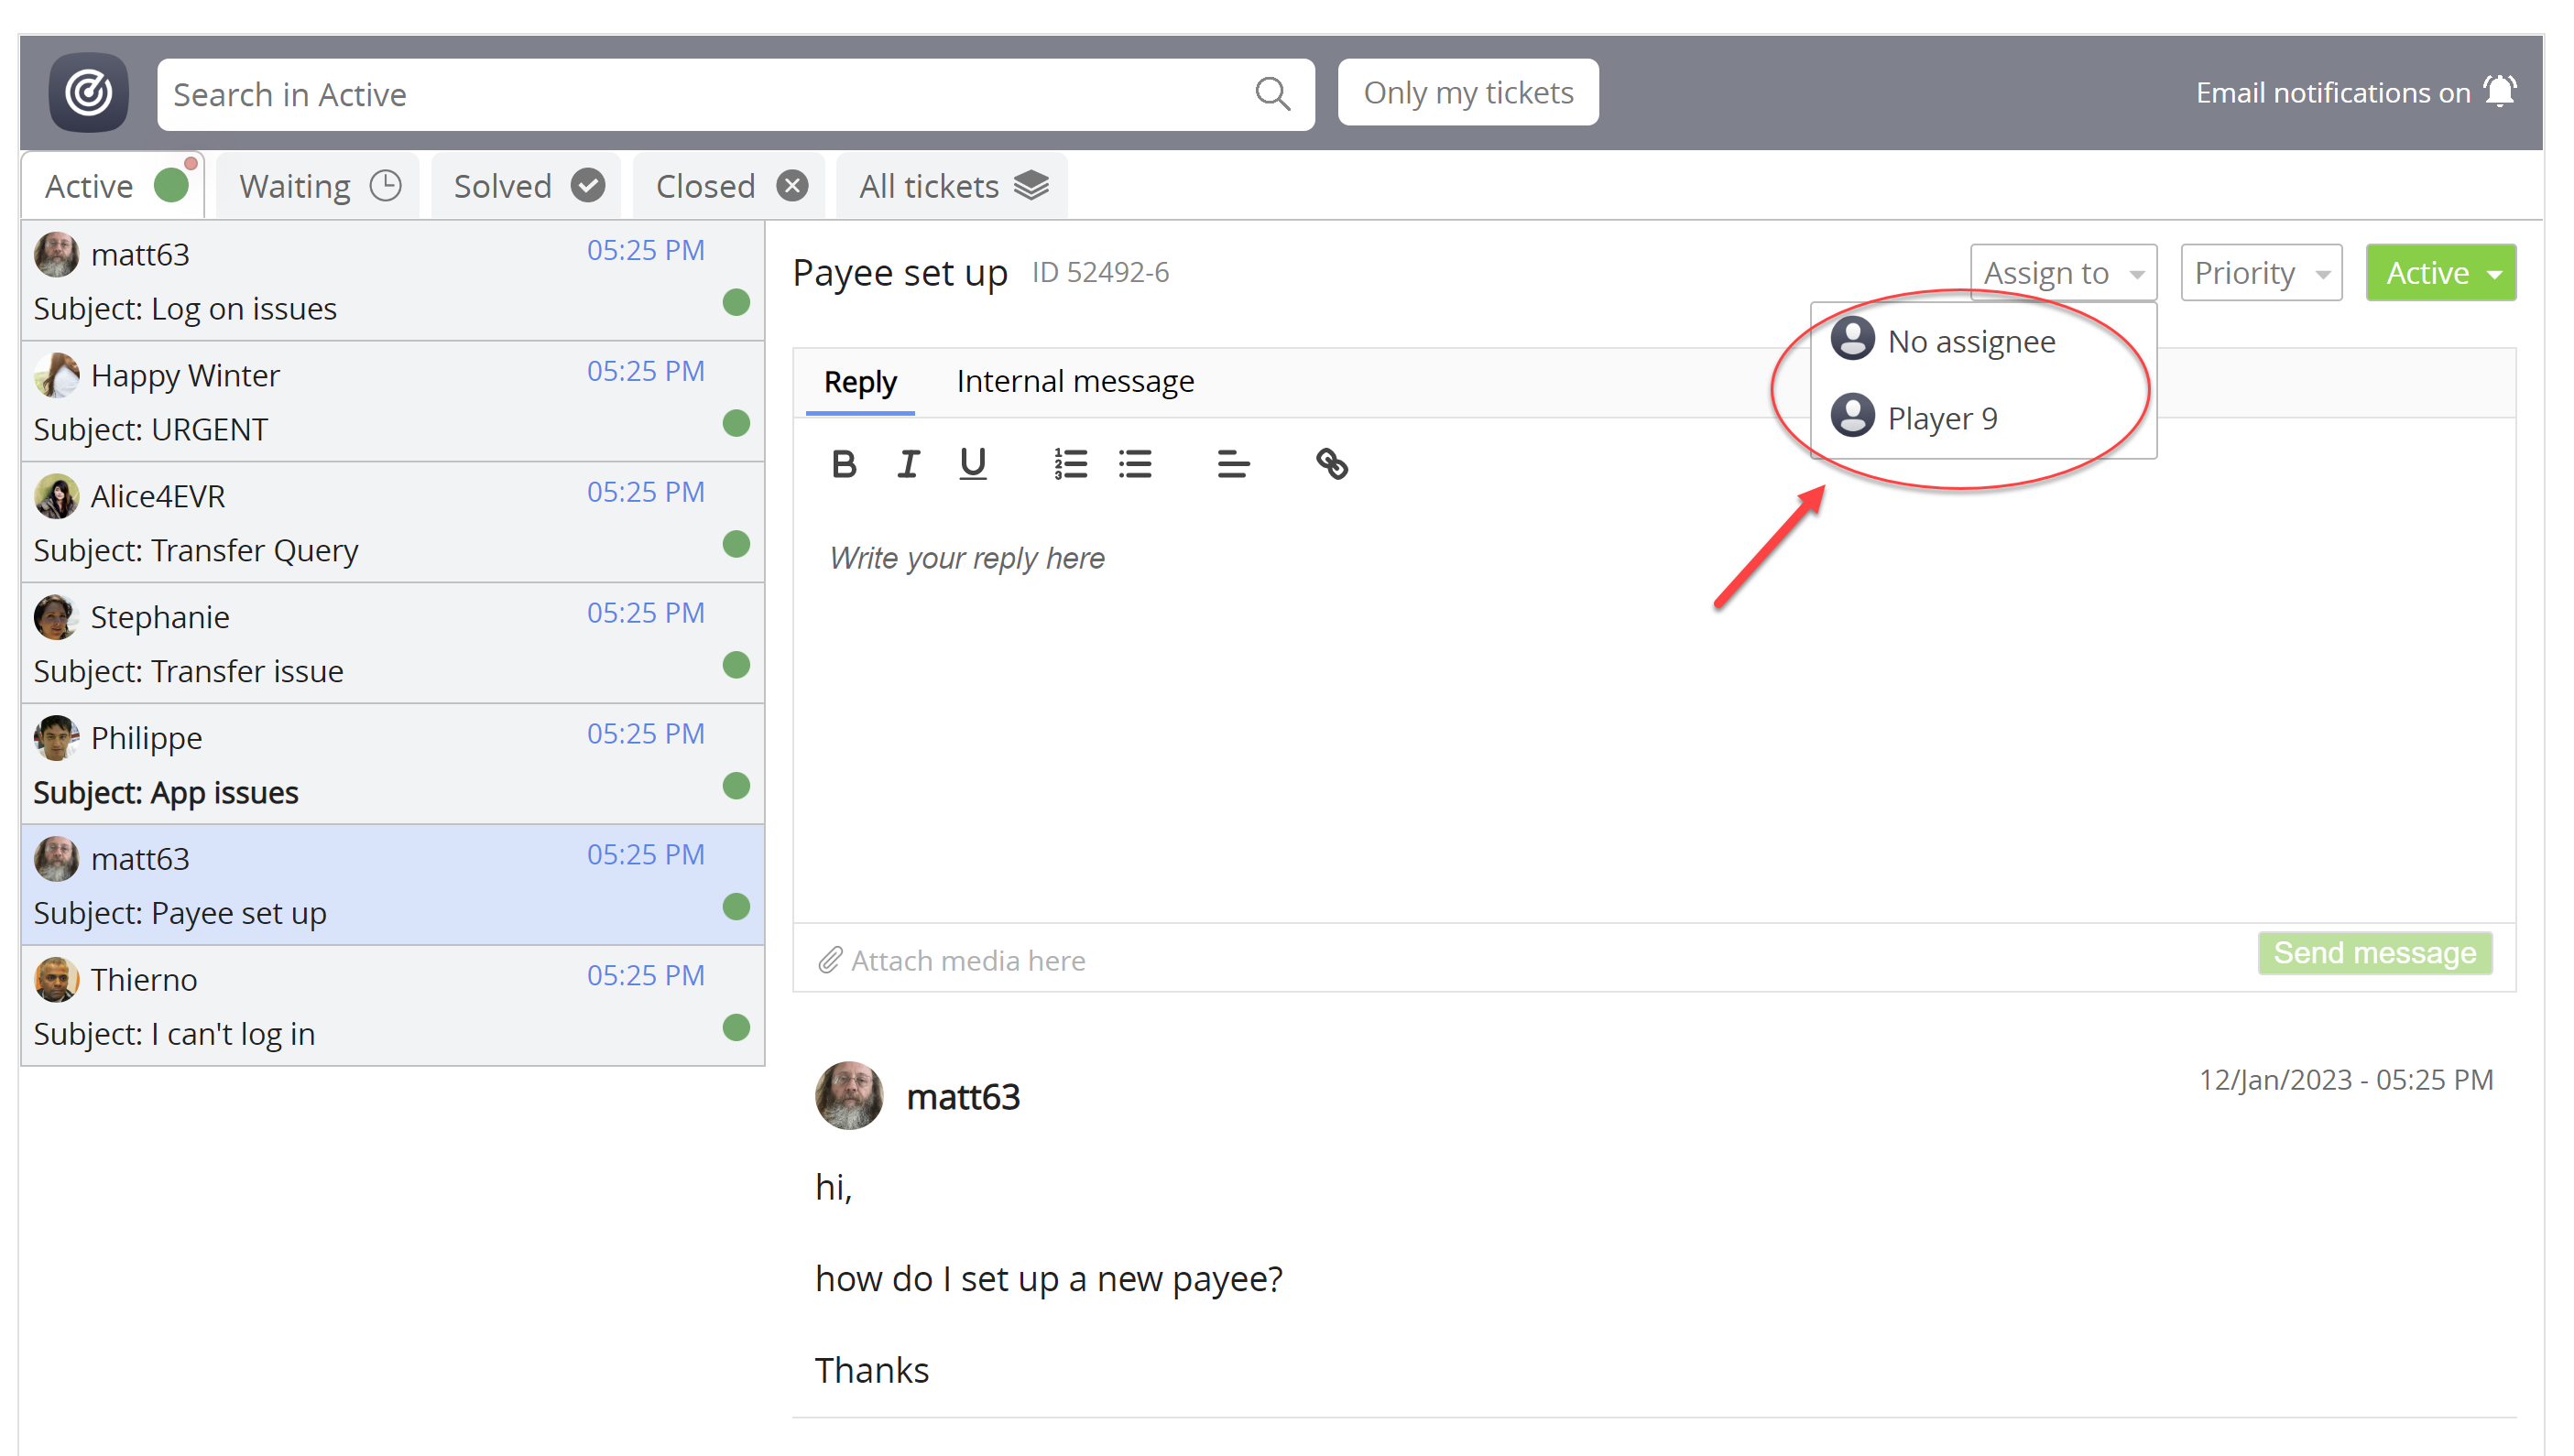
Assigning tickets
- You can assign tickets to another
agent at any time.
- While viewing an individual ticket,
select which player you want to assign
the ticket to.
- Once a player has
been selected from the
dropdown list, the ticket
will automatically be
updated as assigned to
them.
Internal messages
- Players can add internal notes to
tickets, to discuss with their
team.
- Note: Any
notes left on a ticket are visible to
any player with access the Helpdesk/
see the ticket. Notes are not visible
to the players submitting the
ticket.
.gif)
Understanding ticket statuses
You can set different statuses on your tickets depending on the issue or action required.
There are various default ticket statuses implemented in the Helpdesk. A section with tabs for each status will appear under the search bar.
- Active: Tickets that require action/response.
- When a ticket first arrives from a customer to an inbox, the ticket status is set to active by default.
- Waiting on customer: If you expect a reply from a customer after you respond, you can mark the ticket as Waiting on Customer. This indicates that the ticket is ongoing and pending more input from the player. These tickets will not appear in your Active section.
- On hold: This status is useful for when you don't have an immediate solution for the customer, or perhaps need to reach out to another player for further insight. In this instance, you can place the ticket on hold.
- Solved: Once you are happy that the issue(s) in a ticket have been completely resolved, you can mark it as solved.
- Closed: You can use the Closed status for tickets that require no further action.
Changing a ticket status
- You can manually switch a ticket's status at any time simply by using the status dropdown on the ticket.
- Once you change the ticket status, the ticket will be automatically moved into its designated section/tab.
.gif)